XBOX 360 JTAG TUTORIAL, XENON ONLY!!!!******7371 OR LOWER ONLY, IT WONT WORK IF YOU HAVE A HIGHER DASH THAN THAT****
IntroductionIn this tutorial you will learn how to make a Xenon Jtag with a dash 7371 or lower.
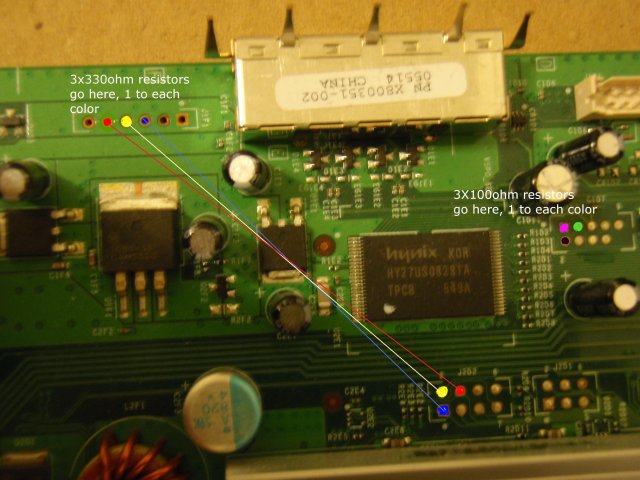
Parts Needed - 5X100ohm 1/4w 5% resistors
- 3x330ohm 1/4w 5% resistors
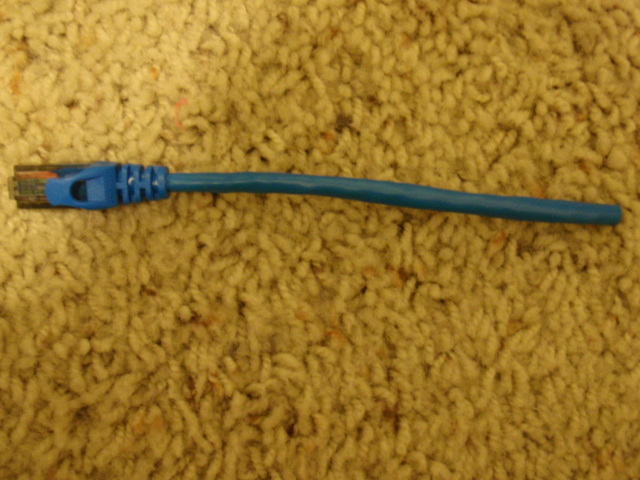
- 1xrj45 coupler
- 1xcat5 cable
- 1xdb25 (male) connector
- 30awg wire
- nandpro20e (needs to be on the root of the hard drive) get it from xbins
Tools Needed Difficulty rating: 4/5
Average Time to Complete: i.e 1-2 hours
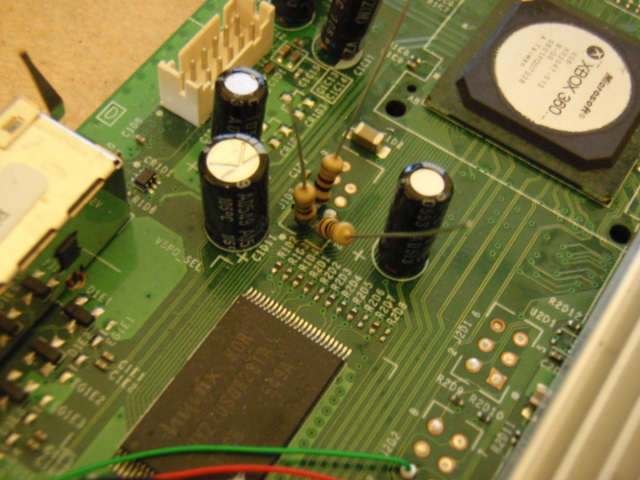
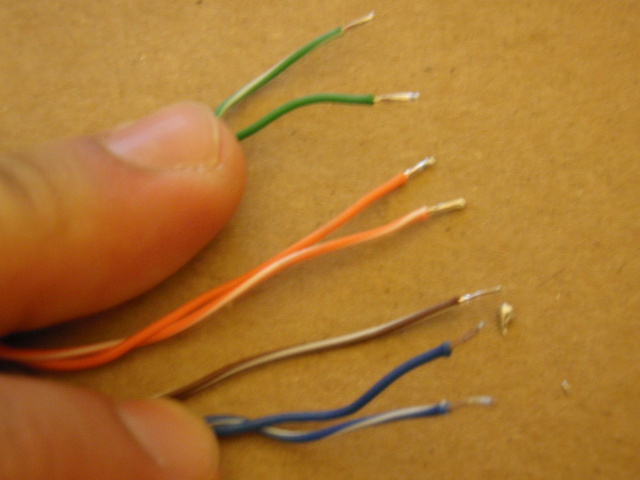
Step By Step TutorialSTEP 1:Take your 3x330ohm resistors and solder one to each of the colors. Take some 30awg wire and solder the wire from the resistors to the coordinating colors.

IT WILL LOOK LIKE THIS:
 STEP 2:
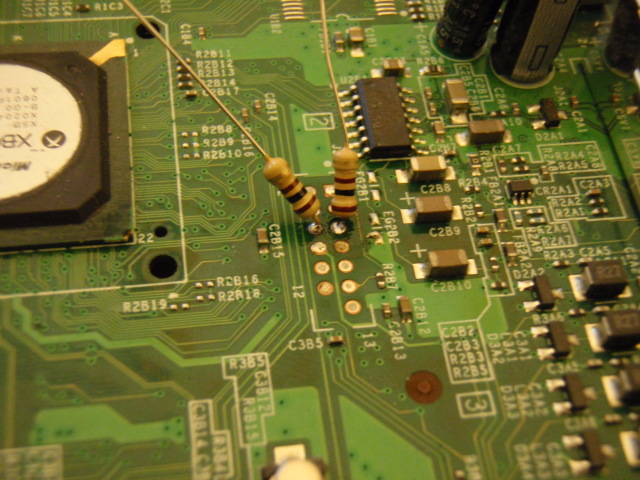
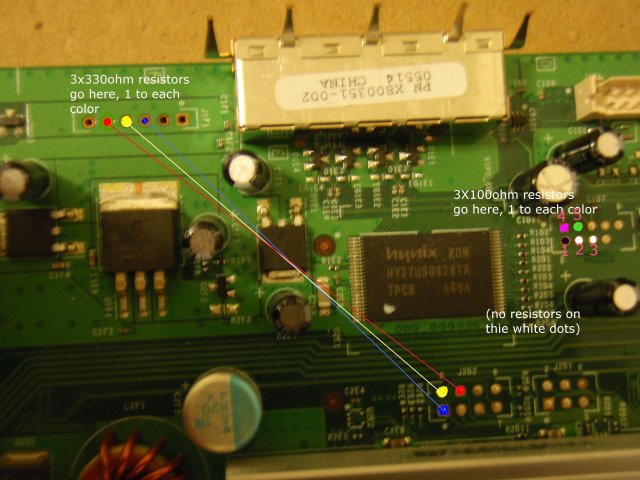
Take 3 of your 100ohm resistors and solder one to each of the colors.
IT WILL LOOK LIKE THIS
 STEP 3:
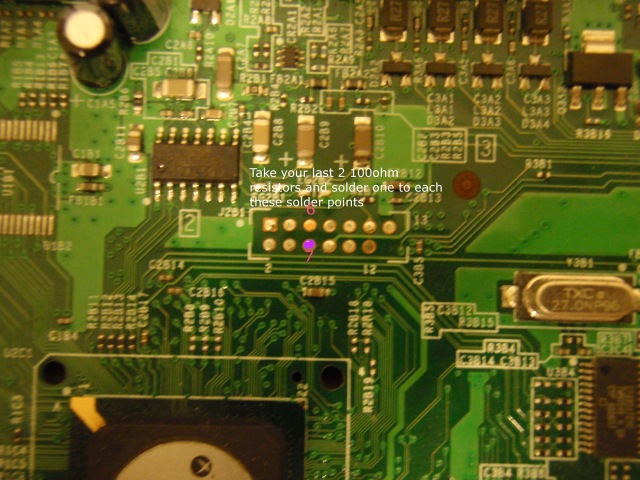
Take your last 2 100ohm resistors and solder one to each of the colors.

IT WILL LOOK LIKE THIS
 STEP 4:
Take your cat5 cable and cut it about 6-7" long (DO NOT CUT IT ANY LONGER THAN THAT)
, and cut your second piece of cat5 cable
about 3" long. The 3" one is going to be used on the inside of the xbox. and the 7" one
is going to get soldered to our db25 connector.
STEP 5:Ok now splice your 3" piece of cat5 cable. You will see a total of 8 wires. You only need 7 of them. It
does not matter what 7 you use, so take the 8th wire and cut it off so there are only 7 wires.
Next you need to tin your wires so you get a good connection.
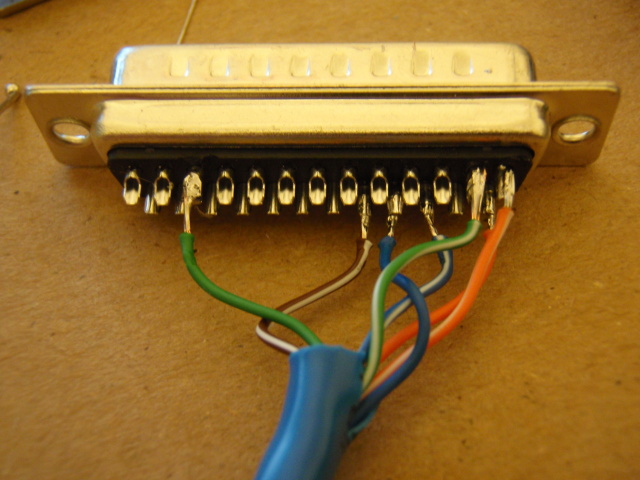
 STEP 6:
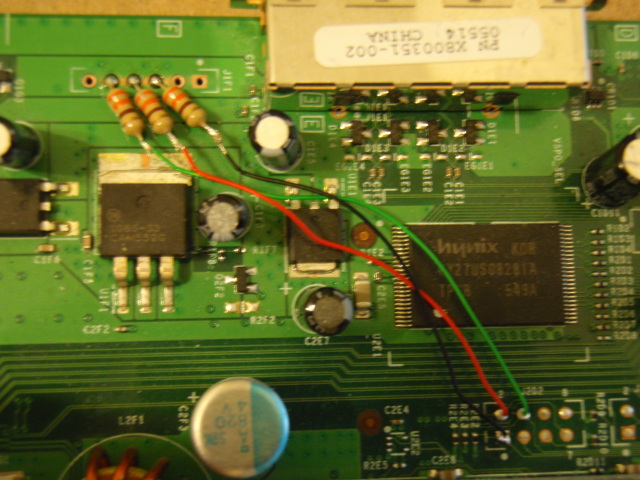
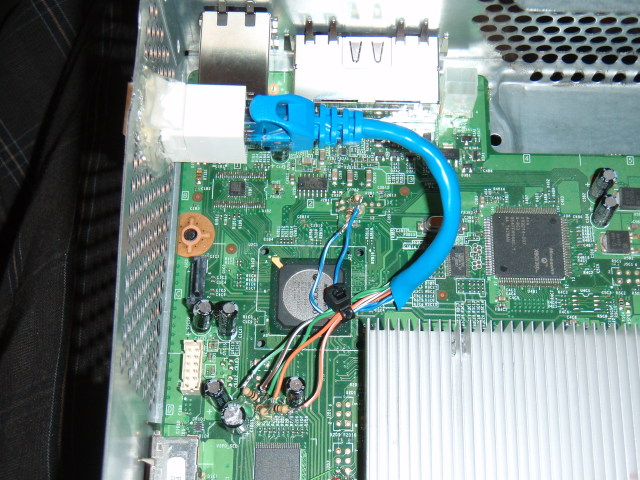
Ok now you really need to pay attention here. Take your tinned/splice piece of 3" cat5 cable and take those 7 wires and solder each one of them to the 7 solder points. It does not matter what wire goes where, just make sure all 7 of your wires are soldered to the 7 solder points on the mobo.
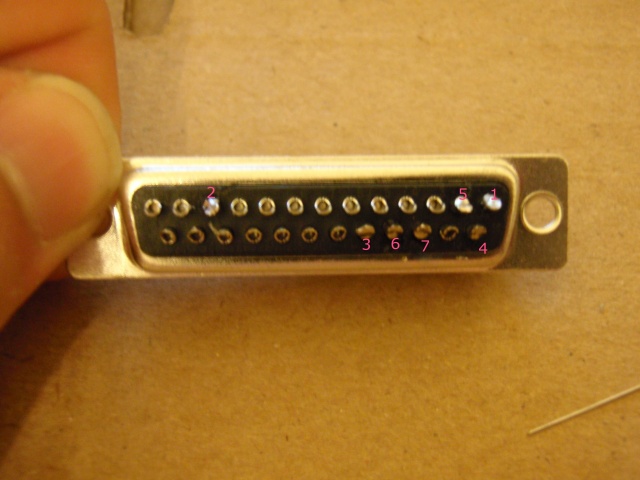
 STEP 7:
THIS IS THE MOST IMPORTANT PART!!! Now its time to solder up your db25 to your cat5 cable. PAY CLOSE ATTENTION. You must follow how i have the numbers. The numbers on the mobo are
going to match up with the numbers on the db25. Pay close attention to the color of your wires
and where they must go.
 STEP 8:
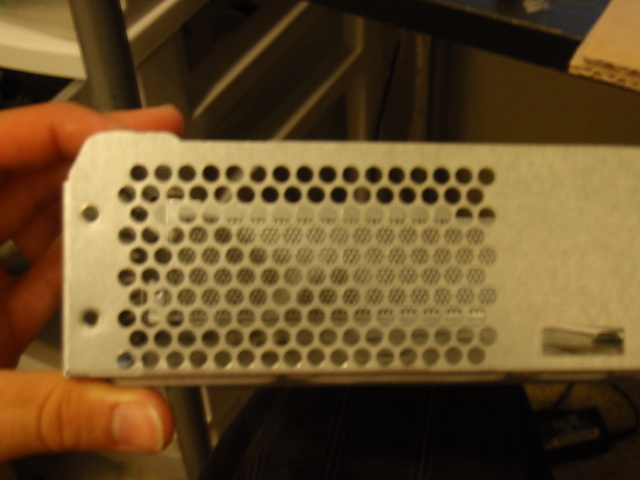
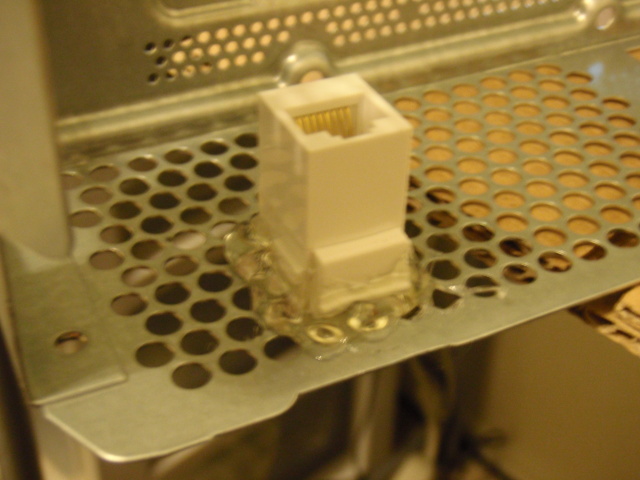
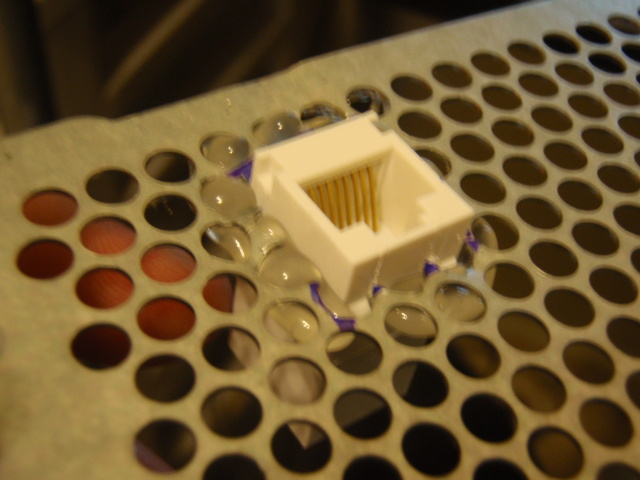
Take your rj45 coupler. Put it up against the metal case of and measure where you want to put it.
Make sure to stay clear of the screw holes. This is how i mounted my rj45. Once your rj45 is
mounted, plug in your cat5 to it.
 STEP 9:
 (DUMPING YOUR NAND)
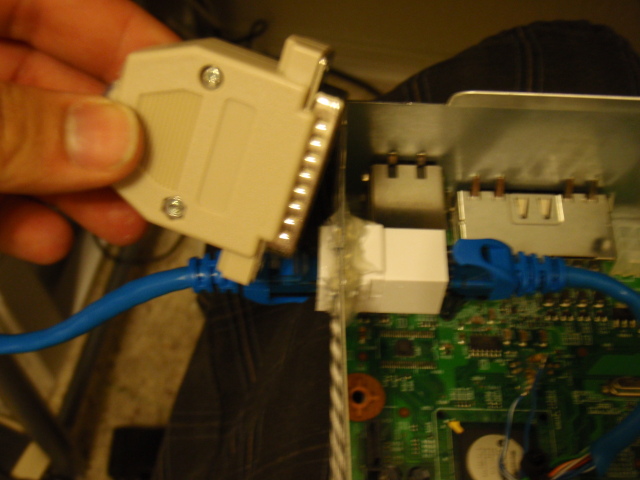
Ok, you need need to plug in your finished db25 cable. Cat5 end to the rj45, and the db25 to your
lpt port. ALSO PLUG IN THE POWER TO THE XBOX
Ok, assuming you already have nandpro20e on the root of your hard drive.... Go to your command
prompt by going to start/run/cmd
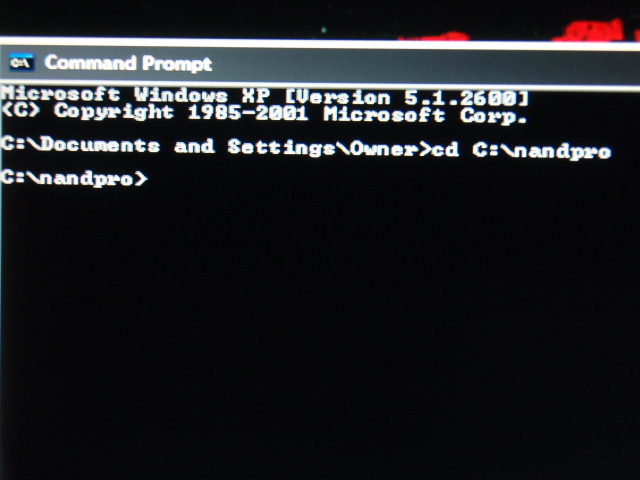
Once your in your command prompt, your going to type "cd C:\nandpro" without the quotations.
It will look like this
Now once you see that, type "nandpro.exe lpt: -r16 nand1.bin" without the quotes.
Then it will start to dump the nand, and if it does not then you need to check your wiring. Also, if it does not work you can remove all the 100ohm resistors and retry.

The next step of this tutorial will be flashing xbr, and updating xbr to freeboot 9199 dash. I will also be showing you how to install xex menu and a custom freestyle dash, coming soon.
XBOX 360 JTAG TUTORIAL PART 2PART 2DOWNLOADXBR, FREEBOOT V.032, XEXMENU, FLASH360 V1.0
[admin] please use virus scan on all files. 9/5/11 suspected worm file in xbins.exe file [/admin]
FREEBOOT v.032: http://www.megaupload.com/?d=AF40BFLASH360 V1.0: http://www.megaupload.com/?d=XEXMENU: http://www.megaupload.com/?d=3XPORT360: http://www.megaupload.com/?dnew software
downloadplease pm admin if file links are removed
PARTS NEEDED: USB THUMB DRIVE OR EXTERNAL HARD DRIVE, AND A HARD DRIVE TRANSFER KIT
STEP 1:WE ARE GOING TO EXTRACT THE KV, INJECT, AND FLASH XBR.
MAKE SURE TO DOWNLOAD THE PROPER XBR FOR YOUR MOTHERBOARD AND
PUT IT IN YOUR NANDPRO FOLDER. RENAME THE FILE TO SOMETHING SMALL,
SO ITS EASIER TO DEAL WITH.
OPEN UP YOUR COMMAND PROMPT.... START,RUN,CMD
NOW TYPE "cd C:\nandpro" without the quotes
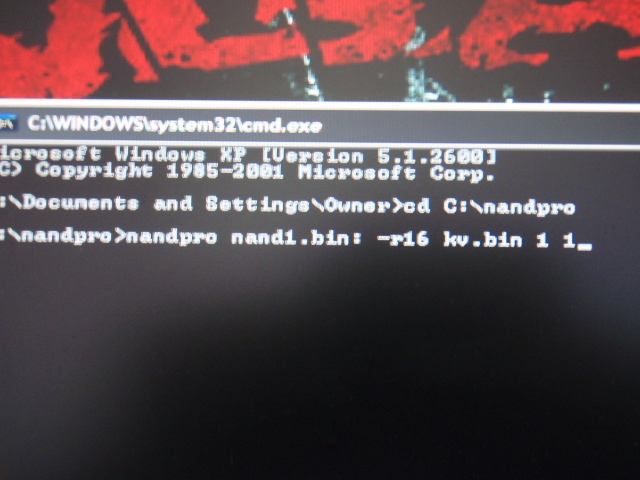
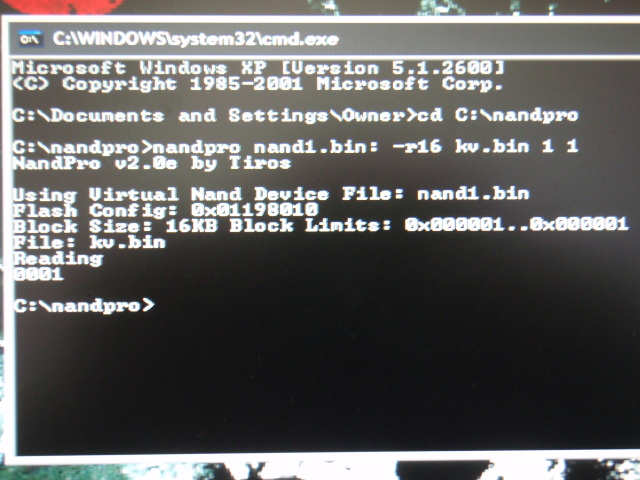
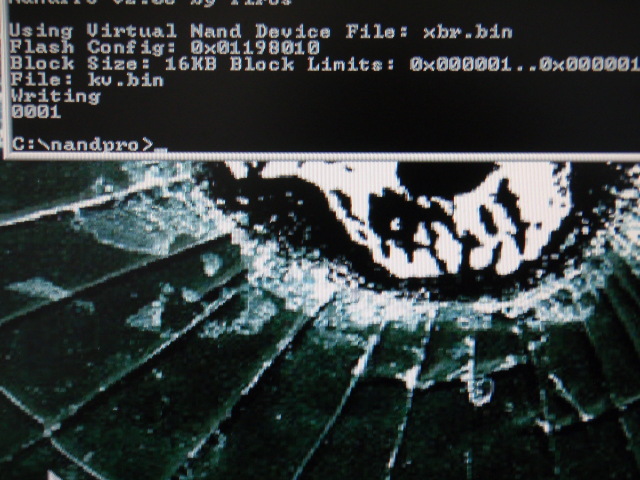
THEN TYPE "nandpro.exe nand1.bin: -r16 kv.bin 1 1" without the quotes
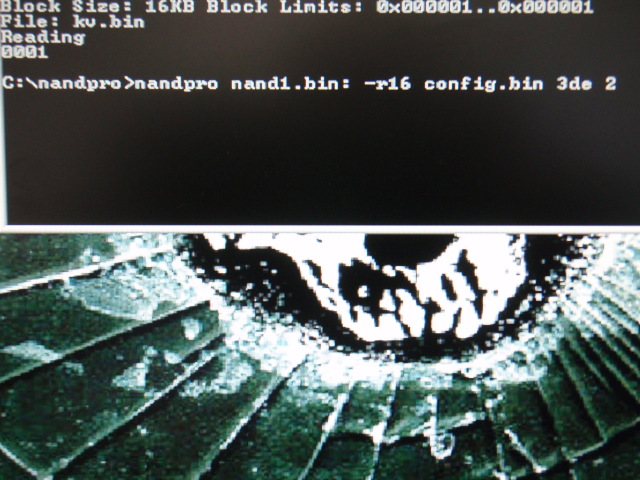
THEN TYPE "nandpro.exe nand1.bin: -r16 config.bin 3de 2" no quotes

THEN TYPE "nandpro.exe xbr.bin: -w16 kv.bin 1 1" no quotes
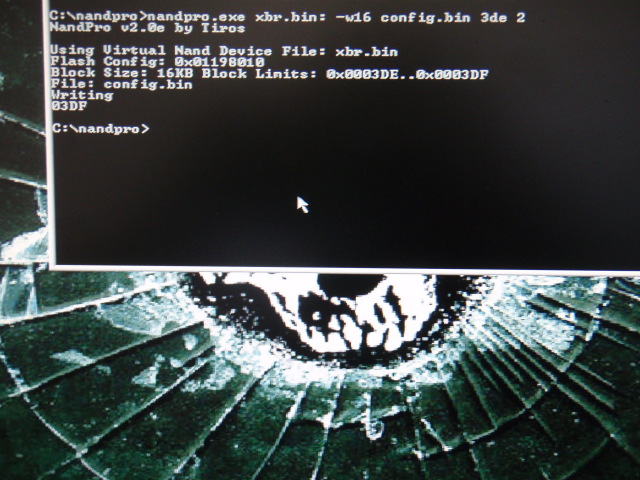
THEN TYPE "nandpro.exe xbr.bin: -w16 config.bin 3de 2" no quotes
OK TIME TO FLASH
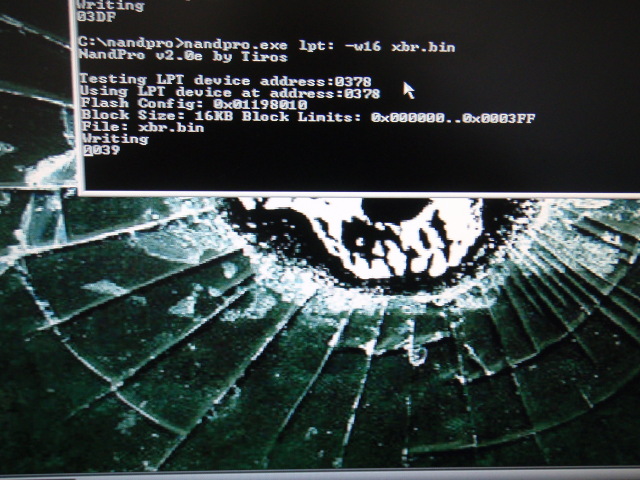
ONCE YOU TYPE THIS, IT WILL TAKE ABOUT 30-35 MINUTES TO FLASH
TYPE "nandpro.exe lpt: -w16 xbr.bin" no quotes
 STEP 2:
 35 MINUTES LATER=CONGRATS, YOU NOW HAVE A HOMEBREW XBOX360
STEP 3: NOW LETS MAKE THIS THING BETTER, RIGHT NOW YOU HAVE XBR WITH
AN OUTDATED DASH, IM GONNA SHOW YOU HOW TO UPDATE YOUR XBR
TO FREEBOOT 9199 FOR ALL YOU MOTIVATORS WANTING TO DO SOME
MODDED LOBBIES.
OK FIRST THING FIRST, YOU NEED TO GET THE CPU KEY, SINCE XBR IS LOADED
ON YOUR XBOX, IT HAS XELL BUILT INTO IT.
TURN ON YOUR XBOX BY PRESSING THE EJECT BUTTON ON THE DISC DRIVEA BLUE SCREEN SHOULD COME UP AND LOOK LIKE THIS

OBVIOUSLY I MARKED OUT MY CPU KEY. NOW YOUR CPU KEY WILL BE A TOTAL OF 32 NUMBERS
AND OR LETTERS. SO PUT TOGETHER LINES 3/5 OR 4/6, AND THAT WILL BE YOUR CPU KEY. MAKE SURE TO TAKE A PICTURE OF THE SCREEN, OR WRITE REALLY FAST. OPEN NOTEPAD AND TYPE YOUR
CPU KEY IN THERE.
STEP 4:
BEST VIDEO TUTORIAL I COULD FIND. I WOULD MAKE MY OWN VIDEO BUT I DONT HAVE ALL MY PARTS IN RIGHT NOW TO FINISH, AND ITS GONNA BE A COUPLE WEEKS UNTIL I GET THEM. I WANT PEOPLE TO START JTAGGING BEFORE THEN. SO HERE IS AN AWESOME VIDEO ON HOW TO PUT XEX MENU,AND UPDATE TO FREEBOOT WITH DASH 9199. (THE GUY IS KINDA OF WEIRD BUT ITS A GREAT VIDEO)
http://www.youtube.com/watch?v=E_SoMbOaFVY&feature=related


