PSP slim dual nubs
 Introduction
Hello fellow Acidmodders, in this tutorial I will be explaining how to install dual nubs on your PSP slim. This tutorial has been requested many times and I happen to have some very helpful pictures. This mod is not for beginners simply because you must work with very small soldering points and risk destroying your motherboard however it is not as hard as it is made out to be there is plenty of room. The second nub will take the place of the X 0 /\ [] buttons used for aiming in some shooting games like Syphon filter making it more natural and easier to aim and enjoy the game
Parts Needed 1. Razor X
2. knyar wire
3. Phat nub
Tools Needed 1. Dremmel
2. Soldering iron
3. Hot glue gun
4. Exacto knife
Difficulty rating:5/5
Very difficult and risky.
Average Time to Complete:About 3 hrs to complete test and tweak.
Notes: You will most likely have too add some hot glue on top of the nub between the faceplate to keep it in place and keep presure on the top so a good connection is made in the nub this is also the reason why you must raise the contacts on the Razor.
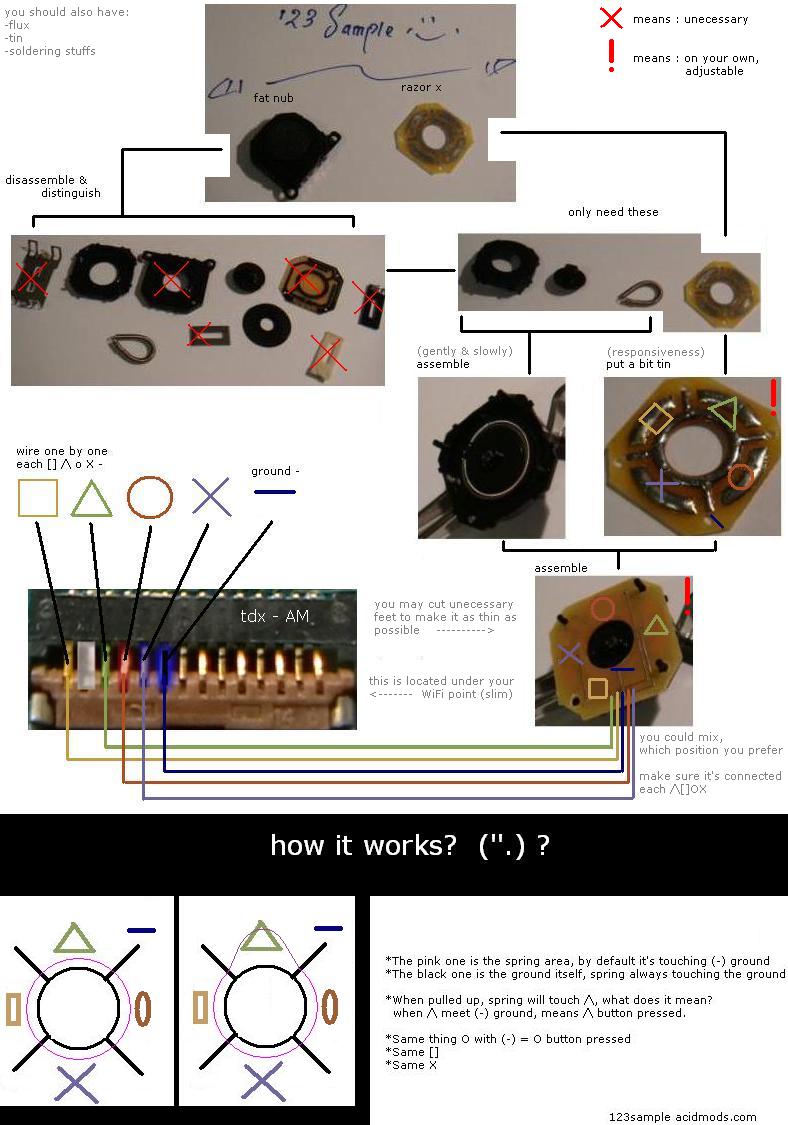
Step By Step Tutorial1. Assemble the Razor x and solder to a short length of wire
2. Open your PSP and remove everything from the casing this will get messy don't want little plastic shavings in your PSP when done.
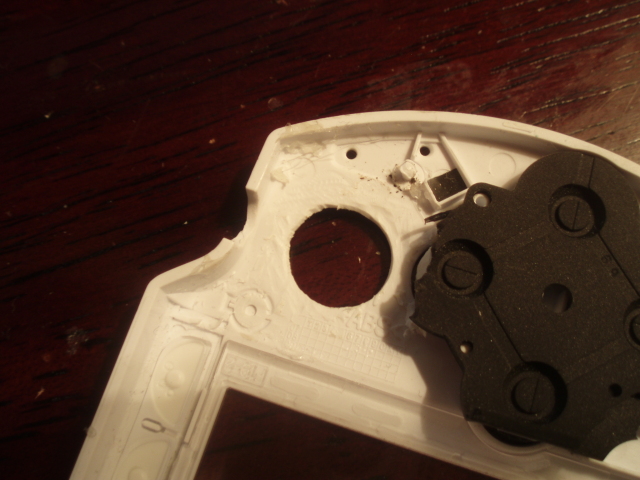
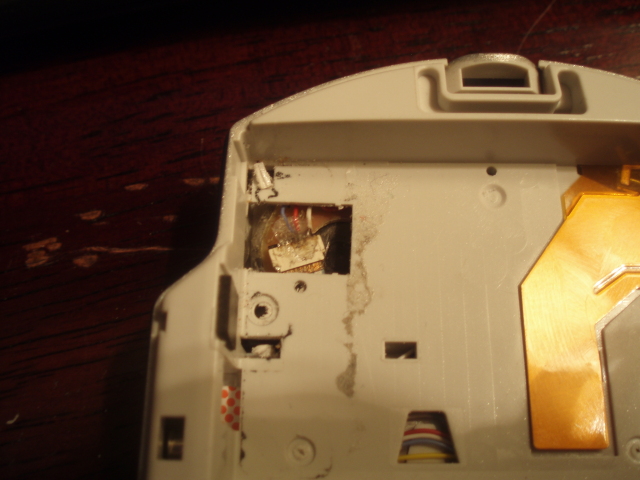
3. Using the sanding bit from your dremmel level all the space showed below, you might want to remove your trim.
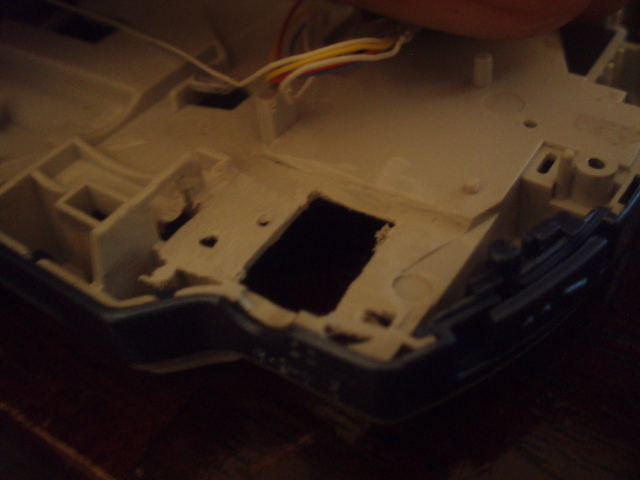
Also there is a screw mount on the face plate it must be removed and smoothed, and drill a large hole in the face plate.
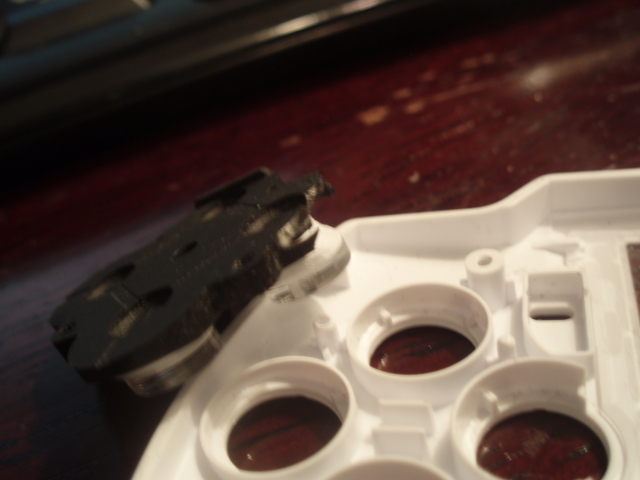
You will also need to cut some rubber off of the button pad and dremmel a divet into the bottom of the X button and remove the button guard at the bottom of the X button.
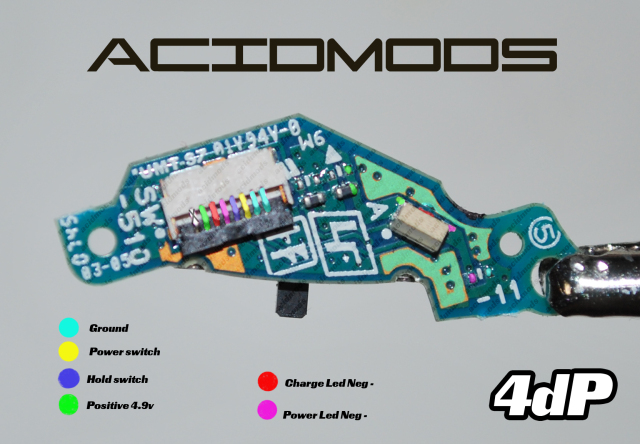
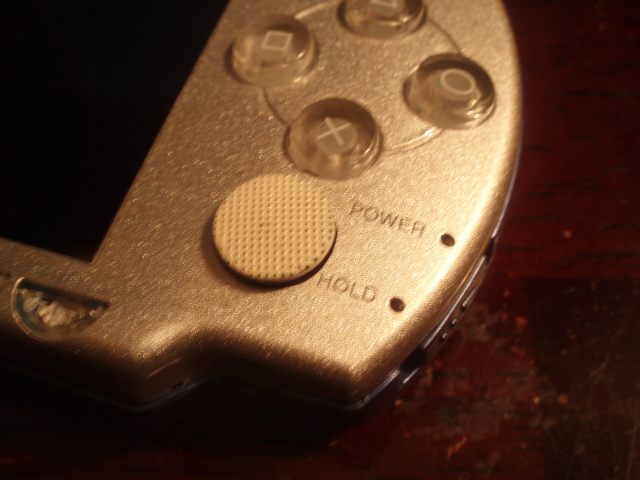
4. Next remove the ZIF connector and switch from your power board. Once the ZIF connector is removed solder a small wire to the ground pin, Power switch pin, and hold switch pin, and power LED- and charge LED- if you wish.
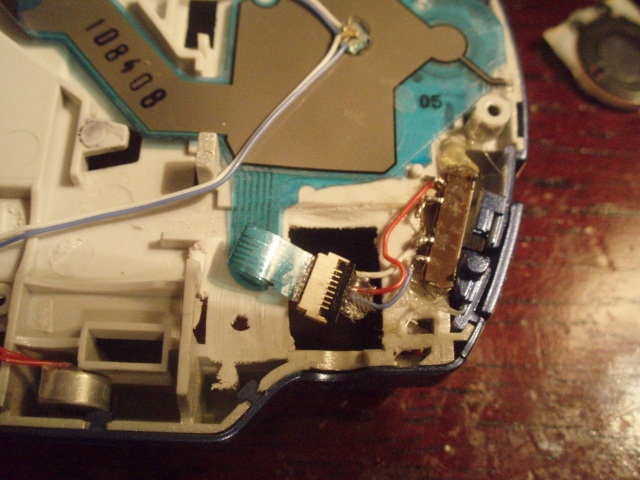
5. Solder the respective wires to the switch and hot glue into place on casing it may take a few tries to position it just right to turn on the PSP and activate hold. Do not put glue under the switch just around the edges and glue to case.
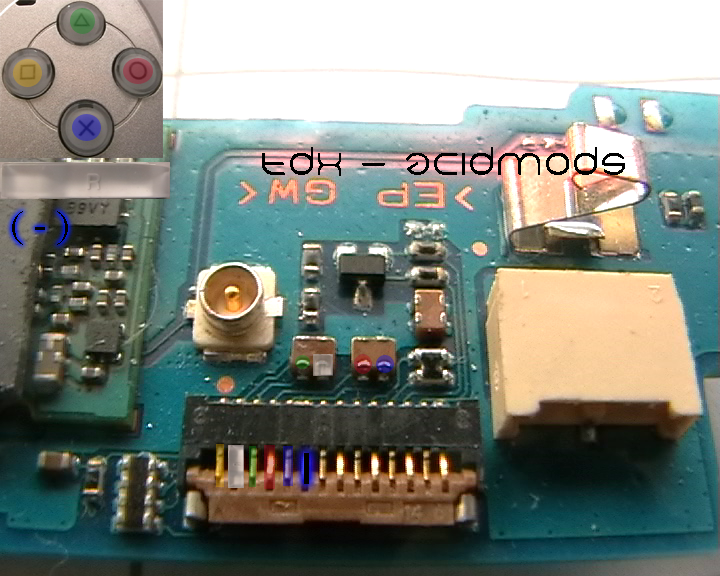
6. Now prepare you're mother board assemble your Razor and solder it to the mobo. I found it easyer to solder two to the ZIF connector and 2 to the components labeled to respective buttons.

7. The nub should rest on top of the switch and there should be plenty of room under it for connector. Put the faceplate on the PSP and make sure it fits flush and your X button works. Flip the PSP over and you will see the bottom of the nub trough a slit in the battery compartment glue the nub to case there with the face plat on to assure it fits and stays in place.
That's it you did it clean up and screw PSP shut and enjoy your creation and hard work!
FAQ/ Troubleshooting1. You may need to raise the contacts on the razor more if a good conection is not made.
2. The raised contacts must be smooth and free of debris if your nub sticks this is most likely why.


